In the following tutorial we introduce to the fundamental ideas of the JGameGrid framework. The paradigm of "Learning by Examples" is applied where each little example is fully functional and has a special didactical intension. The examples are not yet real games to play with, but serve as demonstration of a specific feature of JGameGrid. All sources and sprite images are included in the JGameGrid distribution.
|
Ex01: Actor's Heartbeat: The Method act()
In JGameGrid the game figures are called actors. They have one or more associated images called sprites that are characterized by an image file and, if there are more than one sprites, by an integer sprite identifier. The constructor of the Actor class takes the image file and checks if the particular image is not yet found in a memory sprite store. If not, it is loaded into the sprite store from the given file name that may point to a file packed into the application jar-file or to a relative or absolute path on the disk.
The actor class implements the method act() with an empty body. When the game simulation loop is started by clicking the button Run or calling doRun(), act() will be invoked periodically with a period defined by the slider's position or the value of the GameGrid class property simulationPeriod, that may be changed by the method setSimulationPeriod().
Game figures may be considered as objects of a user declared class that is derived from the class Actor. Already in this very first example, the most important three principles of OOP comes into operation:
- A new class is constructed (Abstraction)
- This class inherits all (non-private) instance variables (properties) and methods (Inheritance)
- If act() is overridden, this methods will be called instead of the base class method (Polymorphism)
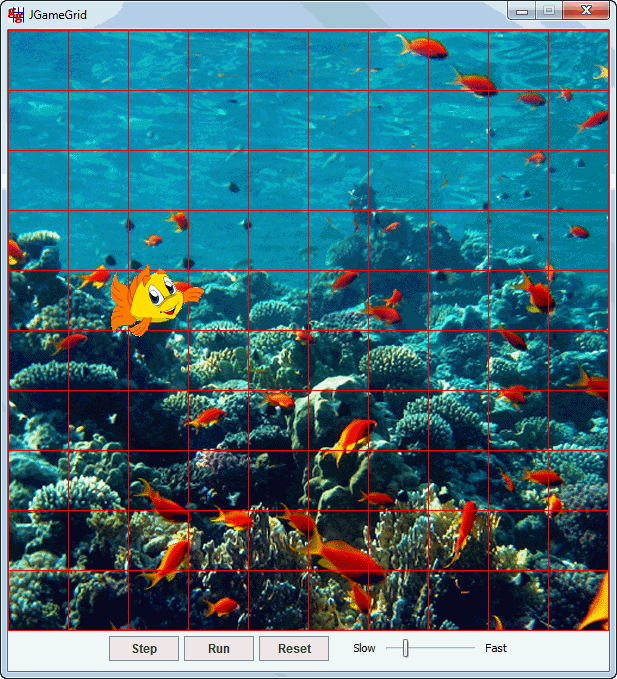
We want a clownfish to move horizontally in a reef background from one border to the other. The sprite image should flip horizontally at the border because a fish never swims backwards. Each actor has a current moving direction of 0 to 360 degrees measured clockwise from the east direction. When the actor is created, its direction is initialized to 0. The method turn(double angle) changes the moving direction clockwise by the given angle. setHorzMirror() takes a boolean value. If true, the actors sprite image is mirrored horizontally. "To be mirrored" should be considered as a property of an actor. As usual in OOP the property itself is private, but may be set and read by public methods. At the border, where isMoveValid() returns false, we get the current state of the boolean property by isHorzMirror() and change it accordingly with setHorzMirror().
Because the movement of the clownfish may be interrupted any time by clicking the Pause button, we must ensure that all properties are reinitialized when we click the Run button again. Fortunately the starting location and the mirror state are restored internally, so we don't need to worry about.
import ch.aplu.jgamegrid.*;
public class Clownfish extends Actor
{
public Clownfish()
{
super("sprites/nemo.gif");
}
public void act()
{
move();
if (getX() == 0 || getX() == 9)
{
turn(180);
setHorzMirror(!isHorzMirror());
}
}
}
|
The constructor of the application class Ex01 first creates the visible game window by using one of the overloaded GameGrid constructors. We want to have 10 horizontal and 10 vertical cells. In JGameGrid length and distances will be measured in pixel units, which are the distance between to adjacent pixels. Cells are always squares, we select a side length of 60 pixel units. Thus the graphics pane (playground) has a dimension of 600 pixel units in horizontal and vertical direction.
The color parameter says that we want to see red grid lines. The last parameter points to an image file that is used as background image. It is positioned at the left upper vertex of playground (the graphics pane). Its size should correspond to the playground size. Image size is normally given in number of pixels. Like we need n+1 trees in a alley with n seats, we need 601 pixels to give a length of 600 pixel units. Thus size of the background image is 601 x 601 pixels or greater (because it is clipped).
Now we put the actor in the game grid by calling addActor(). By passing the actors reference, the GameGrid instance obtains fully access to the (non-private) actor methods. This is necessary to position the actor within the graphics pane and to call the act() method from the GameGrid's simulation loop.
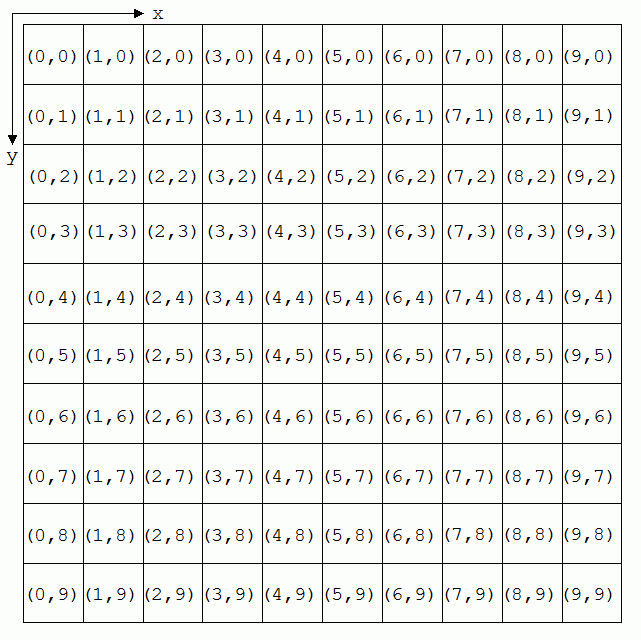
It is important to know the coordinate system for positioning actors within the playground is given by the cell indices. This is very convenient, because actors are automatically positioned at the center of the cell. The integer cell indices are packed into the Location class (to make the difference to pixel coordinates packed into the java.awt.Point class).
 Location coordinates in a 10 x 10 grid Location coordinates in a 10 x 10 grid
The Location class provides some convenient methods to treat with adjacent and neighbour cells. Adding GrameGrid's show() that will display the previously prepared application window finishes our coding.
import ch.aplu.jgamegrid.*;
import java.awt.Color;
public class Ex01
{
public Ex01()
{
GameGrid gg =
new GameGrid(10, 10, 60, Color.red, "sprites/reef.gif");
gg.addActor(new Clownfish(), new Location(2, 4));
gg.show();
}
public static void main(String[] args)
{
new Ex01();
}
} |

Execute the program locally using WebStart.
Ex02: GameGrid in a Custom Window
JGameGrid comes in two flavors: either you use the simple predefined frame window or you integrate the playground in your own frame window or applet container. In the latter case you are completely free how to design the user interface. It may be very professional looking. Normally you will use a GUI-builder to design your application and the GameGrid class may be included as graphical Java-bean with properties like the number of horizontal and vertical cells, the cell size etc. All properties may be assigned by the bean property editor. The following example shows how easy you can integrate GameGrid in a Swing JFrame. Some basic knowledge of using Swing is necessary, especially concerning the "EDT dictate" that states that all Swing methods must be called from the Event Dispatch Thread (EDT).
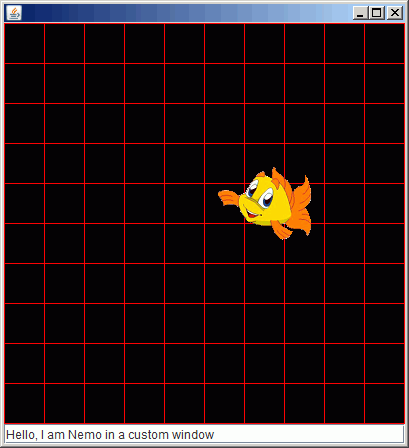
We follow the well-known guidelines how to create a Swing application. Our application class Ex02 is derived from JFrame. The constructor creates a GameGrid instance gg by using the default GameGrid constructor. Unlike when using the other constructors, the properties of the playground are set by setter-methods like setCellSize(), setGridColor, etc. (The properties are even public and could be directly assigned.)
Next the GameGrid instance is added to JFrame's content pane and the JFrame is packed. It is very important to call pack() before you add any actor, otherwise you will get a invalid peer exception. For the sake of the demonstration we add a text field containing a line of test and pack all together. Now we create the clownfish and add it to the GameGrid. To start the simulation loop there is no predefined start button and we must implement our own user interface. GameGrid provides the methods for manipulating the animation machine: doRun(), doPause(), doStep(), doReset() are the software equivalents of clicking the buttons in the GameGrid navigation area.
To be simple in this demonstration, we start the simulation just by calling doRun() before the constructor ends. In order to fulfill the EDT dictate, we use invokeLater() for the creation of the application instance.
import ch.aplu.jgamegrid.*;
import javax.swing.*;
import java.awt.*;
public class Ex02 extends JFrame
{
public Ex02()
{
GameGrid gg = new GameGrid();
gg.setCellSize(40);
gg.setGridColor(Color.red);
setDefaultCloseOperation(WindowConstants.EXIT_ON_CLOSE);
getContentPane().add(gg, BorderLayout.NORTH);
JTextField f = new JTextField("Hello, I am Nemo in a custom window");
getContentPane().add(f, BorderLayout.SOUTH);
pack(); // Must be called before actors are added!
Clownfish fish = new Clownfish();
gg.addActor(fish, new Location(2, 4));
gg.doRun();
}
public static void main(String[] args)
{
EventQueue.invokeLater(new Runnable()
{
public void run()
{
new Ex02().setVisible(true);
}
});
}
} |

Execute the program locally using WebStart.
|