|
|
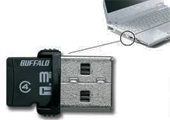
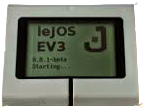
1 Create the leJOS bootable SD card By default the EV3 bricks starts the Lego menu application. To get access to the Linux file system and execute Java byte code it is necessary to configure a special SD card and insert it into the SD card slot. If the card present, the EV3 boots the leJOS menu application instead of the Lego menu. If you remove the card, the brick starts again with the Lego menu. Proceed as follows to create the leJOS SD card:
2 Connect to the EV3 All connections to the EV3 use the TCP/IP protocol, but the physical transport channel may be USB, Bluetooth or WLAN. When booted with leJOS, a Linux Secure Shell (SSH) server with Secure Copy (SCP) is started (but no SFTP server). The EV3 replies also to ping requests. Ping is the easiest way to check if the IP link to the EV3 is working. The default IP address is 10.0.1.1 as seen on the leJOS start screen. For further investigations you should use a SSH console program. Under Linux and MacOS a SSH console is integrated in the OS, under Windows you may use PuTTY, a free SSH and telnet client. As file explorer the GUI-based WinSCP is recommended. Next you learn how to connect your PC to the EV3 via USB, Bluetooth or WLAN.
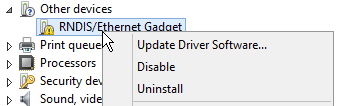
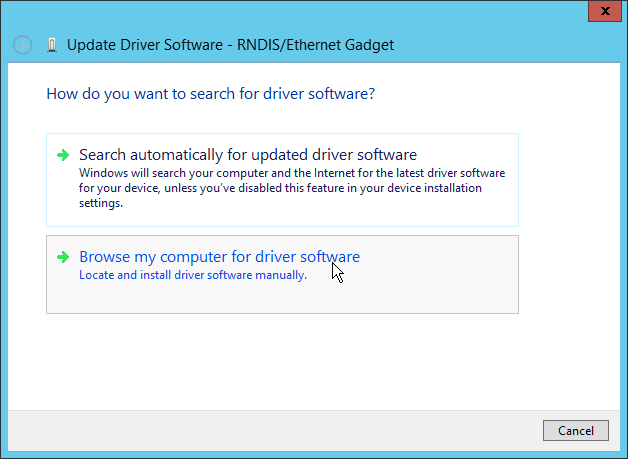
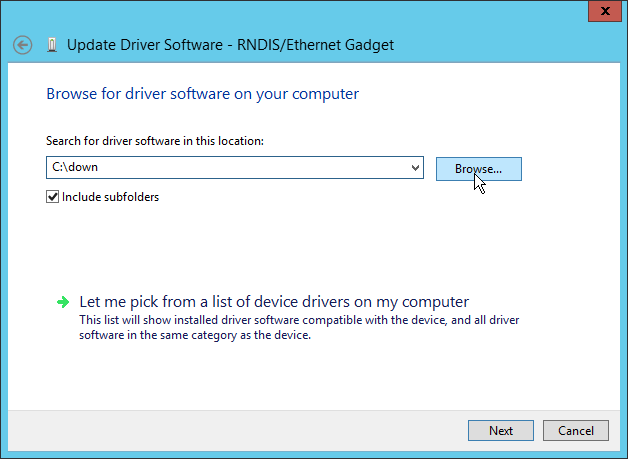
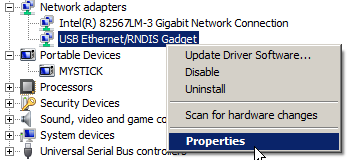
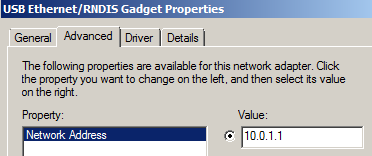
2.1 Connect via USB One practice to communicate with the EV3 is to connect a USB cable between its micro USB port and your PC. The EV3 does not act as an ordinary USB device, but like a IP access point using the Remote Network Interface Specification (RNDIS) that provides IP connectivity over USB. To use this protocol, a RNDIS driver must be present. Under MacOS the driver is part of the latest version of the operating system. Under Windows the driver has to be installed manually. For Windows 7 or 8 proceed as follows:
For Windows 10 proceed as follows:
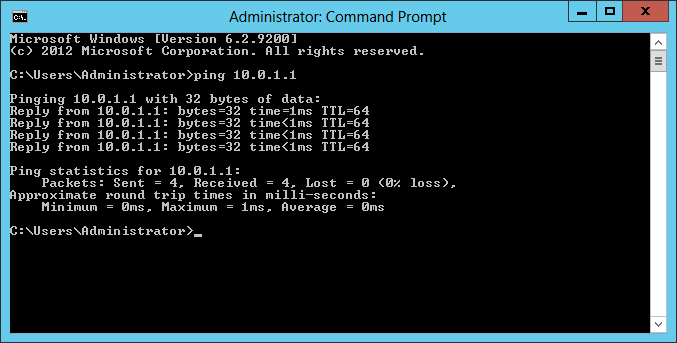
Under MacOS and Linux, no driver installation for RNDIS is needed. Just connect the EV3 via USB and open a command shell. Type ping 10.0.1.1<return> to check the link.
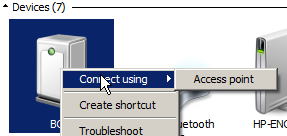
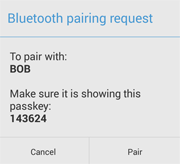
2.2 Connect via Bluetooth The Bluetooth Personal Area Network (PAN) protocol is used to establish an IP connection via Bluetooth. The EV3 acts as IP access point like a smartphone or PC based access point (Bluetooth tethering). This is the recommended connection method because you don't need a cable nor a WLAN adapter. You can change the robots friendly Bluetooth name in the EV3 menu under System - Change name. To enter a new name, move the cursor block using the cursor keys. Confirm each letter by pressing Enter. To finish, move to ✓ . Then reboot the EV3. Boot the EV3 with leJOS and make sure that Bluetooth is switched on in the leJOS menu. There is no other action needed on the EV3 to establish the IP connectivity over Bluetooth On the remote PC/smartphone/tablet you must pair the EV3 like you do it with any other Bluetooth device. Proceed as usual and perform a Bluetooth search. When the EV3 is seen, add the new device. If a security code is shown, confirm it; if a key is required, enter 1234. To enable IP over Bluetooth, the EV3 must act as PAN server. Proceed as follows:
2.3 Connect via WLAN To connect the EV3 via WLAN an external USB WLAN adapter must be inserted into the (standard) USB port. Currently only one adapter type is supported by the Linux system: Netgear WNA1100 WLAN stick (also called Netgear N150 Wireless Adapter). The adapter must be inserted before booting the EV3. Make sure that a Wireless router using the WPA (WPA-PSK) security protocol is available, its WLAN DHCP is turned on and you know the SSID. Proceed as follows to connect the EV3 to the router for the first time:
2.4 Connect from the Internet (WAN) Now your EV3 is connected to a WLAN router and the router is connected to the Internet, you can make it visible from outside the local area network. Since the router firewall normally blocks requests from the WAN to the LAN, you must open the port by configuring the router accordingly. The setup depends on the router type, as an illustration we show the procedure for a LINKSYS router (by Cisco). For SSH and SCP you must open IP port 22, the BrickGate server uses IP port 1299 as default. In the IP address field you enter the IP of the EV3 (that may vary because the EV3 is configured to use DHCP).
If you want to connect a via a remote SSH or SCP client, you have to open IP port 22, to get access to the BrickGate server in standard configuration, you must open IP port 1299.
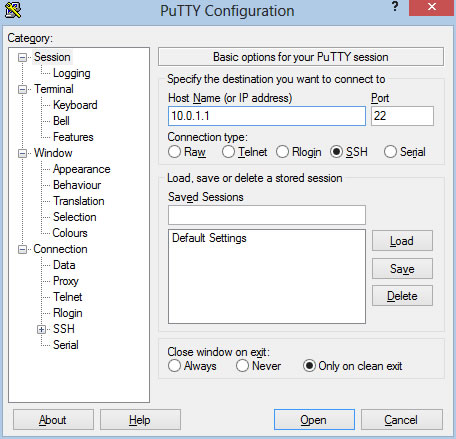
3 Exploring the Linux file system using Telnet, SSH and SCP Once the IP link is established, you may log in the EV3 using a Telnet, SSH or SCP client. Under Linux and MacOS command line versions of all these clients are ready to use without any additional installation. Under most flavours of Windows a command line version of Telnet is also preinstalled. Keep in mind that Telnet uses IP port 23 and SSH/SCP port 22. So if you connect via WLAN, your WLAN router/firewall must be have these ports open. To connect the first time to your EV3 open a terminal (command prompt) and type telnet 10.0.1.1<cr>. Log-in as user root and empty password. Under LInux and MacOS you may also connect with SSH by typing ssh 10.0.1.1 -l root<cr>. When the password is requested, enter <cr> for an empty password. Under Windows a GUI-based client is recommended. A sample session with SSH looks like this: Install PuTTY (get the download link from an Internet search) and start it. Enter the IP address (via USB and Bluetooth: 10.0.1.1, via WLAN: address displayed in the EV3 menu).
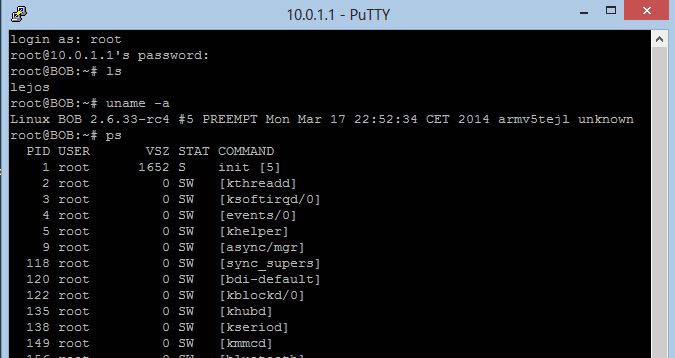
A console window opens and you log in with username root and empty password. You are now in the home directory of the root user and you can perform Linux bash commands with root privileges, e.g.
With ps you also see the Java VM running the leJOS menu:
You can stop the menu and the VM by killing the process:
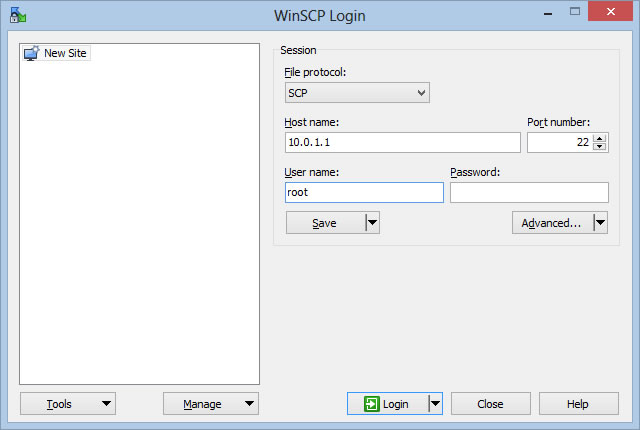
and all EV3 buttons are dead. To explore the file system, it is convenient to use the GUI-based SCP client WinSCP. Select the SCP protocol in the File protocol field.
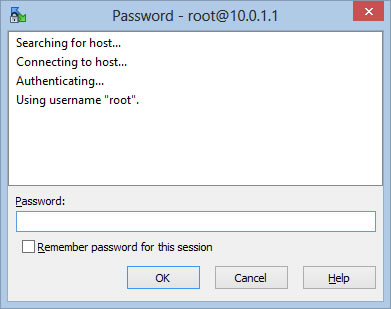
Use an empty password:
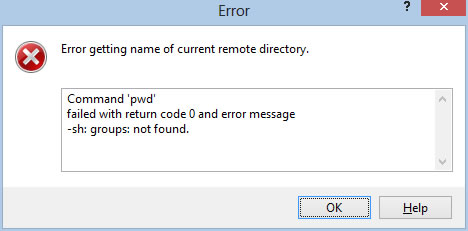
and ignore the error message:
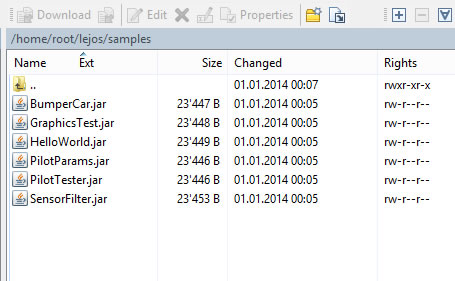
You may navigate to the /home/root/lejos/samples directory and see all programs there:
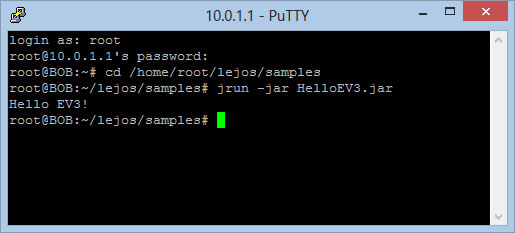
To convince you that the EV3 is full-fledged computer running Linux, write HelloEV3.java with your favorite Java IDE and create a JAR file HelloEV3.jar. public class HelloEV3 Upload HelloEV3.jar to the EV3 with WinSCP and execute it in the SSH console using the jrun command (which has the same command line options as the java command).
You may also dive deeper into the Linux file system and have a look into the /bin directory where you find the jrun script file among other scripts that you may inspect.
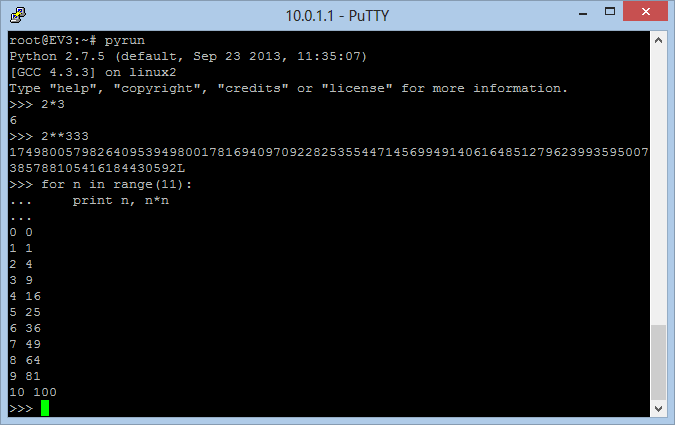
4 Python programming with the EV3 The SD card image distributed from this site contains an Python 2.7 interpreter for embedded system that is automatically installed together with the leJOS installation. Some additional Linux scripts are added into /home/usr/sbin, so Python is ready to be used after the leJOS system boots. As usual Python scripts run fast and efficiently on this ARM processor. Even if you are not (yet) a Python programmer, open a SSH shell and enjoy, how easy programming may be.
The additional shell scripts in /usr/sbin are immediately available in a SSH command shell because this directory is in the system path. You may modify them or add your own scripts here. Make your own scripts executable by calling chmod +x <your_script>.
Python scripts have access to the EV3 hardware via the BrickGate server. For more information consult the BrickGate site.
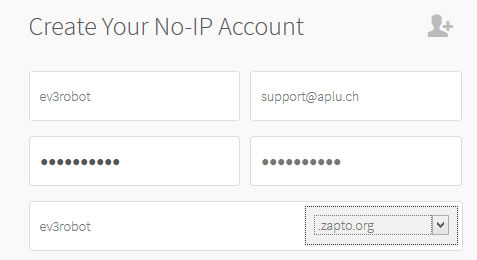
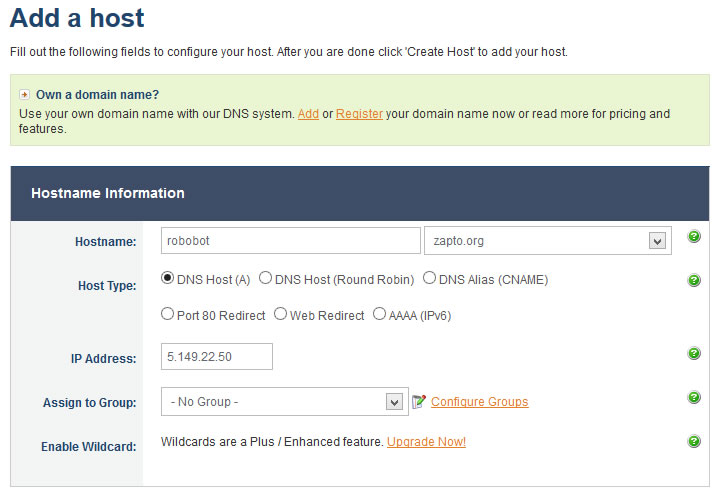
5 Using the Dynamic Update Client (DUC) of the BrickGate Server The EV3 may serve as front end processor for data acquisition using its sensors (temperature, humidity, luminosity, etc.) or for switching relays connected to the Prototype (SuperPro) board by HiTechnic. It is also highly instructive to connect simple home brew electronic circuits to the EV3 to acquire data or control machines and devices. Remote control via the internet adds an extra thrill and challenge to these projects. As seen above, connecting the EV3 to a WLAN access point that includes an internet (WAN) connection is simple. The only catch is that the IP address of the router (and thus for the EV3) may be changed unpredictably by the internet provider (unless an expensive fixed IP is purchased). There is a workaround to this problem: The remote client does not connect directly to the router but via a special internet relocation server with a fixed host name that is aware of the router's current IP address. Such relocation services are provided (even for free) from different companies, one of them is www.no-ip.com. This technique requires that the EV3 sends periodically the current IP address of the router to the relocation host. Such an application is called a Dynamic Update Client (DUC). Because most internet providers renew the DHCP address only once in day or even less frequently, a DUC update period of 1 to 5 minutes is adequate for most applications. But of course the connection from the remote to the EV3 may fail during this time interval. The BrickGate server includes a DUC that conforms to the requirements of no-ip.com and may be manually configured by a properties file ev3jlib.properties that is in the /home/root directory of the EV3 file system. (The DUC is disabled by default.) Follows the procedure how to get a free no-ip.com account and configure it:
6 Developing autonomous programs with Eclipse and other IDEs Developing autonomous programs for the EV3 is simple. For pure leJOS programs add ev3classes.jar from the leJOS distribution to your project class path (as external JAR). If, in addition to the leJOS class library, you want to use the EV3JLib class library, three additional conditions must be met to run the program successfully on the EV3:
If you use our extended leJOS distribution, you have nothing special to do, because:
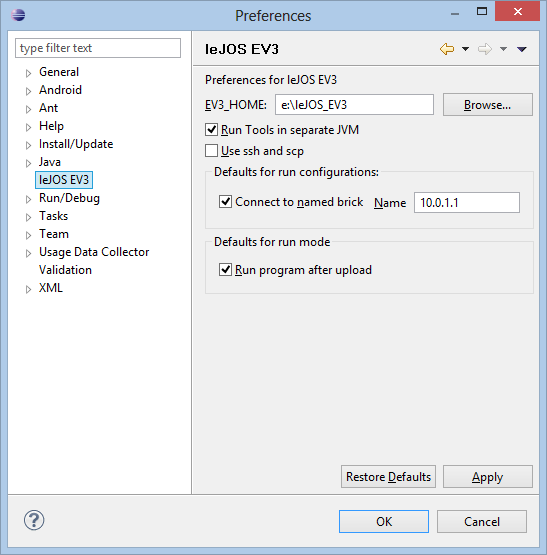
For Eclipse a leJOS plugin is available. Check the leJOS website to see how to install it. The EV3 may be connected via USB, Bluetooth or WLAN. All you have to do is to enter the appropriate IP address in the Name field of the leJOS EV3 preferences in the Window menu item.
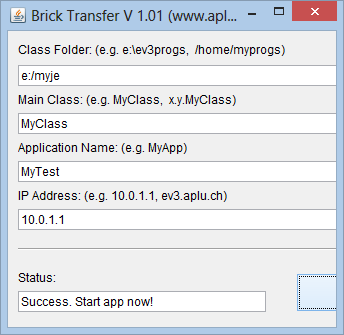
With other IDEs (Netbeans, BlueJ, Java-Editor, etc.) add ev3classes.jar from the leJOS distribution and EV3JLibA.jar from the EV3JLibA distribution to your project class path. After compilation, the Java class files have to be packed in a JAR archive with a MANIFEST.MF file that contains a Main-Class entry. Then the application JAR must be downloaded to the EV3 in the /home/lejos/programs folder and started from the leJOS menu. Packing and downloading manually is a somewhat ackward and lengthy process, but it's a one-click operation with our BrickTransfer utility. Download BrickTransfer Utility
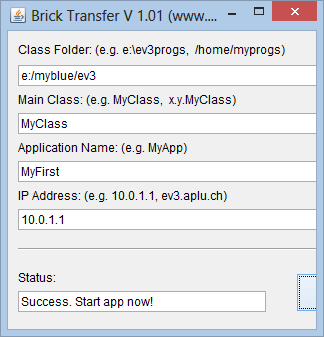
The class files reside in the <projectroot>/build/classes folder. BrickTransfer even supports a package structure. In this example MyClass.java uses the x.y package. Add EV3JLibA.jar and ev3classes.jar to the project Libraries and compile with Clean and Build. Then press the OK button in the BrickTransfer dialog.
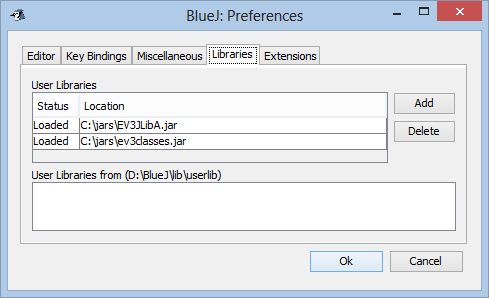
Example for BlueJ: In Preferences add EV3JLibA.jar and ev3classes.jar to the user libraries.
Edit the source program and press the Compile button. The class files resides in the root of the project root. More than one application file may be used in the same project (each with a main-method). To differentiate them, set the Main Class entry to the class that you want to be executed. Of course all classes are packed and downloaded, but only one is started. The Application Name is arbitrary.
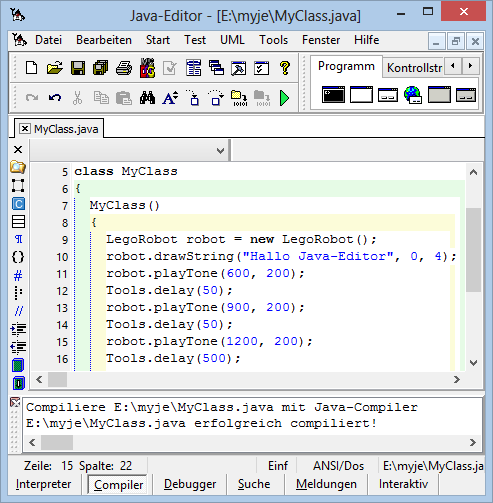
Example for Java-Editor (German edition): Unter der Menü-Option Fenster | Konfiguration | Java Interpreter werden im Feld Classpath-User die beiden JARs ev3classes.jar und EV3JLibA.jar angegeben. Mit Ctrl-F9 wird die Quelldatei compiliert, danach mit BrickTransfer auf den EV3 geladen und dort ausgeführt. Es können sich mehrere Quelldateien mit je einer eigenen main-Methode im gleichen Dateiverzeichnis (hier e:\myje) befinden. Man gibt in BrickTransfer unter Main Class diejenige an, die dann auf dem EV3 gestartet werden soll. Der Application Name ist beliebig wählbar.
|
||||||||||||||||||||||||||||||||||||||||||||||||||

 .
.